Many types of wax can be used to make candles, but perhaps none is better suited for the task than beeswax. A beeswax candle is one of the best options for any household. Whether you’re looking to create a relaxing atmosphere or want to use them as mood lighting. It produces a gentle glow that glimmers through the dark, creating a cozy ambiance for any room you burn it in. A beeswax candle is an eco-friendly alternative to other wax candles. These candles come with several benefits that other types of candles just can’t provide, such as being clean-burning and non-toxic. This blog post will go over everything you need to know about beeswax candle making; what materials are needed, how it’s done, and how they should be cared for!
Why choose beeswax candle making
Beeswax is the most sustainable of all candle waxes. It comes from a thriving industry in which honey bees make their homes. This ancient product has been infused with energies that contribute to pollination, healthful survival rates for these animals as well as other insects crucial to our environment. Without them, we would be left stark-raving mad!

There are many reasons to choose beeswax candles.
- Beeswax is a renewable resource.
- It can be collected without damaging or killing the bees.
- Beeswax comprises over 300 components that have healthful properties, generally being antimicrobial, antioxidant, and anti-inflammatory. That is why top-notch organic-based cosmetic brands also use it in skincare products.
- Beeswax candles burn for longer than paraffin wax candles are non-toxic when burned.
- It emits negative ions which help purify our environment by neutralizing harmful free radicals in the air (they make up for all those times you skipped your daily yoga class).
- And, of course, beeswax has a very pleasant smell. What’s not to love?
Beeswax candles are better than other waxes
Is beeswax a better alternative to other types of waxes? It is a great question, and one that I feel has been answered 100 times!
Paraffin wax candles have been around since 1867 and still remain one of the most popular choices today despite many negative opinions surrounding them, like possible carcinogenicity (cancer-causing). Paraffin candle is usually made of petroleum by-products (shale oil), giving it an unpleasant solvent odor and releasing carcinogenic chemicals like benzene and toluene once lit up.
The biggest con for these candles, though? Paraffin candle releases high levels of black carbon emissions. It can actually contribute to indoor pollution, which will cause many people respiratory issues like asthma or allergies/sinus problems. However, it is less expensive than beeswax, so you can use them in just about anything!
There are various other types of natural waxes such as plant-based waxes or vegetable wax used for making candles. We have been using natural soy wax for most of our recipes. Soy wax is an easily available, 100 percent plant-based, cruelty-free, and sustainable alternative to paraffin wax. But, beeswax is a luxury!
Much like honeybees themselves, beeswax is a renewable resource that’s a product of a complex and fascinating natural process. Did you know honey bees must make nearly 80 million trips to gather enough nectar to produce just one pound of honey? – That means they’re not only making something that is great for us, but they’re working really hard to do it!

Beeswax candle making is an eco-friendly and sustainable process
Because the bees use nectar instead of water or oil. This makes them biodegradable as well, which means that you don’t have to worry about harming Mother Earth while enjoying your candle-making activities at home.
Beeswax has a low melting point, which is why is used to create candles. It is made up of an average of about 70% saturated esters and fatty acids; this minimal amount makes them one of the cleanest burning waxes available. They’re also very soft when they’re in their pure form.
Beeswax candles emit negative ions meaning they purify the air while being burned! So beeswax candles are definitely the better choice for people looking to improve their indoor air quality. Beeswax candles are longer-lasting than traditional paraffin-based candles with no soot or smoke emissions when burning.
Scented beeswax candles for aromatherapy
Beeswax candles will produce a light and pleasant honey smell when burning, but it’s not too noticeable. And, if you are into aromatherapy, then the scented beeswax candle is the bee’s knees.
Scented beeswax candles are great aromatherapy tools as they combine beeswax’s therapeutic benefits with the essential oil or synthetic fragrance oil that beeswax candles are made from. The fragrance from the essential oils stimulates various senses, which will trigger different responses within your body; some scents will lift your mood while others may calm you down. A scented beeswax candle may help if you are feeling down or depressed by elevating your mood, which will also benefit you physically and mentally.
You can experiment with adding essential oils to your wax if you want more than just the honey scent- perhaps considering lavender or vetiver for its calming effect? They can be very calming and relaxing; this makes them perfect for those who suffer from stress or anxiety. Sandalwood is another option for scenting beeswax candles that are used in aromatherapy. It has a profoundly calming effect. Try 1-2 ounces per pound of molten beeswax.
Filtering raw beeswax for your beeswax candle making
Beeswax is a natural, organic wax that is obtained from honeycombs and used in the creation of beeswax candles and other products. And there’s nothing better if you can source raw beeswax from a local beekeeper. But you need to filter raw beeswax to remove any impurities or unwanted particles before using it for beeswax candle making.
Gather up the following supplies to get started with filtering beeswax so that it is suitable for use in your crafting projects.
- Heat-safe bowl
- Double boiler
- Cheesecloth or any other fabric
- Candy thermometer
- Parchment paper
Heat the raw beeswax
Line the bottom of the container with parchment paper if you’re using it as a mold. This will ease the removal of newly formed candles.
Lightly heat raw beeswax in a double boiler (or in a pot nestled in a larger pot of water if you don’t have a double boiler). Raw beeswax can scorch easily when heated directly over flames. This step will eliminate any debris like dead bugs, bee parts, etc, in unfiltered beeswax, which could be harmful when burned.
Do not add water to raw beeswax. Raw beeswax is naturally anti-microbial and can inhibit proper burning if too damp. Instead of adding water, add 2 ounces of sodium chloride (table salt) per pound of raw beeswax and heat until all salt is dissolved in wax (this may slightly reduce the volume of your wax).
Filter it using cheesecloth
Raw beeswax reaches its maximum filtering benefit when it has reached a pasty consistency or is at 130 degrees F to 140 degrees F (use a candy thermometer).
Filter the melted wax by passing through a cheesecloth into your storage container. Raw beeswax can be filtered more than once for added purity and clarity to the finished product.
If the wax becomes too hard, just heat it back up and stir to return to a pasty consistency. Lightly heating the wax after filtering will help remove any water that may have been introduced during filtration, which can harm your finished candles, cosmetics, etc.
Allow it to set
Allow filtered beeswax in form of a wax sheet or block to set for 12 hours before attempting to remove them from the molds. Alternatively, you can use a beeswax sheet, beeswax block, beeswax pellets, or beeswax pastilles; either of these can be procured from a thrift store or online.
Let’s now have a look at other ingredients to try out the easiest recipe for making homemade beeswax candles.
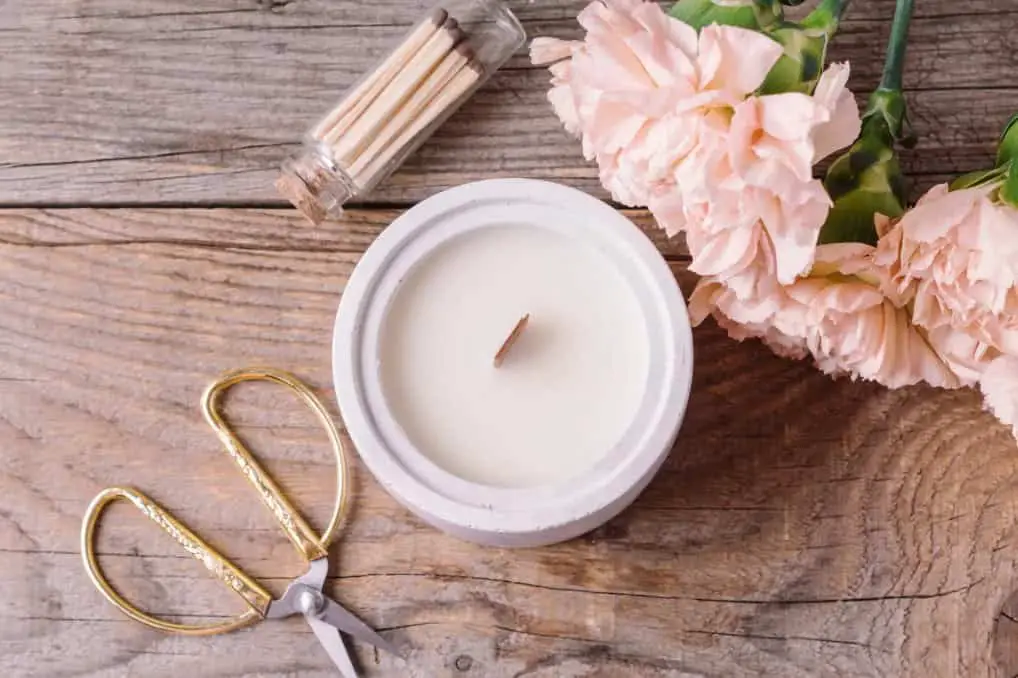
Beeswax candle making: How-to & materials needed
The first step in making a DIY beeswax candle is to procure the ingredients and supplies needed, such as beeswax, candle wick (in this case cotton wicks), molds for pouring candles (in this tutorial, we will proceed with both silicone molds and mason jars. However,-almost anything made of metal or glass will work fine), and appropriate tools.

Here’s a complete list of materials needed for making beeswax candles:
- Beeswax pellets
- Coconut oil
- Cotton or wood wick
- 100% Natural essential oils
- Measuring cup
- Double-boiler
- Wick holders
- Hot glue or wick sticker
- Candle mold or mason jar
- Heat-resistant silicone ladle
- Thermometer
- Crayons or dye blocks (optional)
Or you can order a candle-making kit online.
Your guide to beeswax candle making
1. Melting the wax
The first thing you should do when starting your candle-making journey with beeswax is to melt the beeswax pellets. Beeswax can be melted on its own if necessary; however, it’s recommended to mix it with other types of waxes. This also helps create a harder candle that lasts longer.
A double boiler is helpful in melting the wax so it doesn’t burn or stick to the pot. It could be as simple as a small, heat-safe pouring pot that sits inside a larger glass Pyrex or stainless steel pot. Another way to quickly melt beeswax is in a Crock-Pot.
If you are using a double boiler, put some water in the pot so it won’t burn the wax when placed directly over the heat source or stove burner. Add three parts of beeswax pellets with one part oil (coconut oil works best) inside the bowl and melt them together slowly while stirring constantly until blended well together.
Avoid letting water come into contact with the melted wax because it could dilute the natural chemicals in beeswax that make it burn better. To avoid this, keep the water in the bottom pot filled no higher than halfway up the sides of the upper pot.
2. Preparing the wick
After melting the wax, cut a length of cotton string to fit your candle mold or candle jar. Any old mason jar or glass jar can be repurposed as a candle container. But, if you are using a commercial mold, first check with the supplier on what size is recommended for best results.

A general rule for wick length is to add 1/4inch for every ounce of beeswax used. Attach the wick to the bottom of your mason jar with hot glue or by using a wick sticker. Wrap the free end of the wick around the pencil or use wick holders to keep it straight and centered. With a sharp knife or scissors, round off the ends of the wick so they won’t fray after being lit.
3. Scenting your beeswax candles with essential oils
A scented candle is a great way to enjoy the scent of your favorite essential oil while you burn them! They are all-natural, burn slowly, and diffuse their wonderful aromas effectively. However, not all scents will work well with beeswax candles so it’s best if you experiment with scents to see which ones will work best for your homemade candles.
Some scents that work really well with beeswax candles are:
– Cinnamon – Clove – Pineapple – Citrus
For this tutorial, we will be using cinnamon oil – if you would like to create your own blend, keep in mind that some oils are stronger than others so you’ll want to play around with small amounts first.
After your wax is cooled to a lower temperature, add between 1 to 3 ounces of oil per pound of melted beeswax once the temperature of the wax has dropped to about 165 degrees F. This is where having a mason jar with a lid comes in handy – it will prevent any fragrance from fading over time!
4. Pouring the wax

Once the candle has cooled to about 155 to 160 degrees F or gets a thin film over the top, pour the melted wax into your mold or jar. Place your candle jar on top of an old towel or several layers of newspaper. Fill each jar about halfway with hot wax and hold it down for a minute, so the wick stays in place. Then fill the jar all the way up to the top, let them cool.
You can also make beeswax chandeliers in holiday shapes or simple pillar candles or taper candles using candle mold.
5. Removing them from molds
If you’re making your candles in silicone molds, dip each candle mold in a pot of hot water for a few seconds-the bottom should be submerged, but the top should not. Beeswax has a low melting point, so it will be easy to remove from the mold. Once your candles are out of the mold, smooth over any rough edges with a knife or sandpaper.
Trim off the excess wick and label each candle with its scent and type.
Why use coconut oil in beeswax candle making?
Adding coconut oil to beeswax may not be necessary because most people who blend their beeswax use a combination of paraffin and soy wax or beeswax with a stearic acid additive. However, if you are going to be using mostly pure beeswax for your candles, then coconut oil is definitely the way to go. It will give your candles that extra oomph without fail.
- The melting point of natural beeswax is at 62 degrees Celsius, and coconut oil’s melting point is 74 degrees Celsius. This makes it so easy to blend with beeswax.
- Coconut oil is excellent for beeswax candles because it has excellent scent qualities, which means it can be added to the candles to give them an extra boost in scent.
- It increases the amount of light reflected from the candle by acting as a sparkle enhancer. Coconut oil boosts your candle’s burning quality too by giving off less soot, making it burn longer with a brighter flame.
- It also helps with softening and conditioning the wax, making your candles softer and more appealing.
- Coconut oil also acts as a type of mold release to make it easy to take your candles out of the molds.
You can experiment by adding different amounts of coconut oil to your beeswax depending on how much bulk you want the finished product to have – more coconut oil may mean more volume, but it will also make the finished product harder.
So if you are making your own pure beeswax candles with no additives, consider adding coconut oil. It will help give your finished product better scents, more volume, better burning qualities, softer wax that’s easier on the skin, plus less risk of allergies, greater light refraction, less smoke production due to cleaner burn properties longer-lasting quality.
Will your beeswax candles go rancid?
If you’re like me, you have asked yourself: will my beeswax candle go rancid?
The short answer is no. Rancidification in candles begins when unsaturated fatty acids or double bonds oxidize using atmospheric oxygen. Using pure beeswax this rarely happens over time because the wax has few unsaturated fatty acids compared to other sources.
Though coconut oil has a high concentration of unsaturated fatty acids, a coconut-beeswax candle is very stable and doesn’t go rancid easily. It has a low oxidation rate. This means that your beeswax candles will last longer without spoiling or smelling funny.
How to care for beeswax candles?
Most problems are caused by the temperature of the melted candle wax. If the candle is too hot, it can crack the candle jar. The ideal temperature to pour the candle wax is around 130 degrees F.
- When you pour the melted candle wax into the jar, tilt it slightly to let any bubbles escape.
- Do not stir the melted candle wax while pouring; this will create more bubbles.
- The best way to maintain beeswax candles is to trim the wick regularly with a pair of scissors. Snip off 1/4 inch at the top, so the beeswax melts down evenly. This will ensure that they burn properly and last longer.
- Beeswax candles can burn steadily for up to 4 hours, depending on the size of the beeswax candle. Burning beeswax candles for more than 4 hours at a time can cause them to become soft and misshapen, especially with small beeswax candle tapers. To prevent excessive heat from warping the wax, snuff out the flame when it has been burning for 3-4 hours.
- If a beeswax candle has been extinguished for more than 3 hours, it can be relit as long as it is still within the 4-hour limit. However, if a beeswax candle has been extinguished for less than 3 hours, it should not be lit again as this could alter the color of the beeswax and make the candle dirty and sticky.
- The best way to store beeswax candles is in a room with an open window. If beeswax candles are stored outside, they should be covered to protect them from dust and insects.
I hope you enjoyed this article, and if you have any further questions, please feel free to leave them in the comments below! Thank you for reading.